HR FORMS
The HR Forms Workplace enables you to create reports for HR master data, personnel time data, and payroll results with an attractive layout.
HR FORMS Workplace is accessed by the T-Code HRFORMS. This Workplace is categorized into three different sections namely,
- Overview Screen
- Data Maintenance Screen (HR Forms)
- Form Maintenance Screen (Form Builder)
HR Forms Workplace
T-Code HRFORMS will navigate us to overview of HR Forms Workplace.

Figure 1: HR Forms Workplace
Form Creation
HR Form creation involves data selection and form layout separately. In data selection we use MetaNets, InfoNets to select the data that needs to be printed on the form whereas we can select Smartform / Adobeform for form layout.
In this document we make use of the Adobe form to design the layout.
Step 1: Create Form
Click on the create button in HR Forms Workplace which opens the create form sub window.
Enter the form name, country grouping as per the business requirement and form class depending on the type of form you want to create.
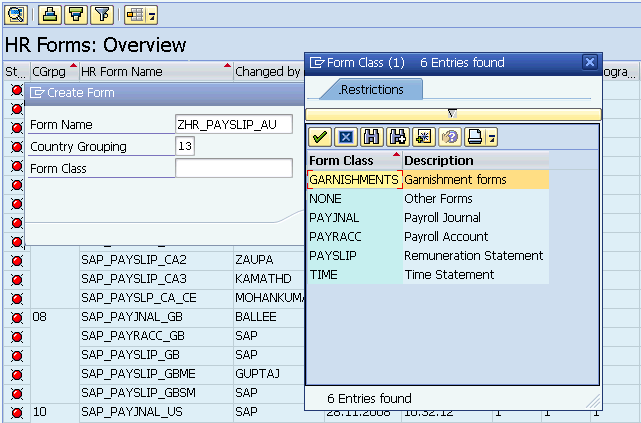
Figure 2: Create Form
You can also make a copy of the existing standard HR Forms within the required country grouping and do changes as per business requirement.
STEP 2: InfoNet Maintenance
The Form ZHR_PAYSLIP_AU is created and the SAP Standard MetaNet is populated based on the form class selected as in Figure 2.
User defined MetaNet can be created using the T-Code HRFORMS_METADATA.
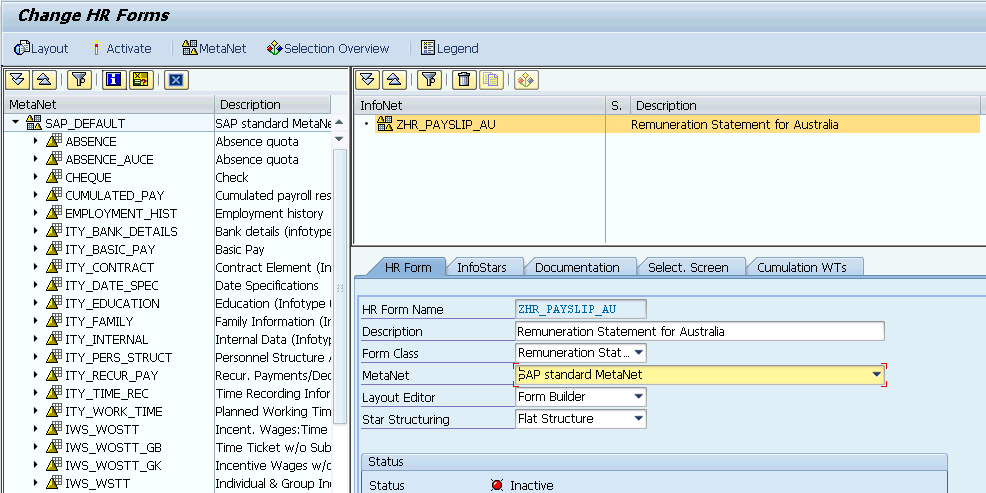
Figure 3: Change HR Forms
Layout Editor can be selected based on the requirement as shown below.
SAP Smart Forms – Design Layout using Smart Forms
Form Builder – Design Layout using Adobe Forms
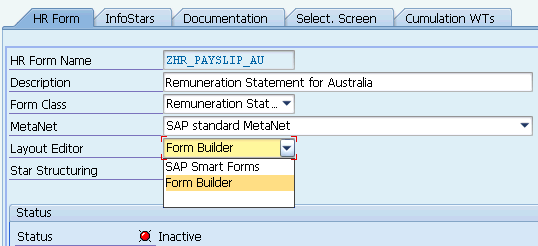
Figure 4: Layout Editor
In the Selection Screen tab, Fields that needs to be displayed can be selected based on the business requirement.
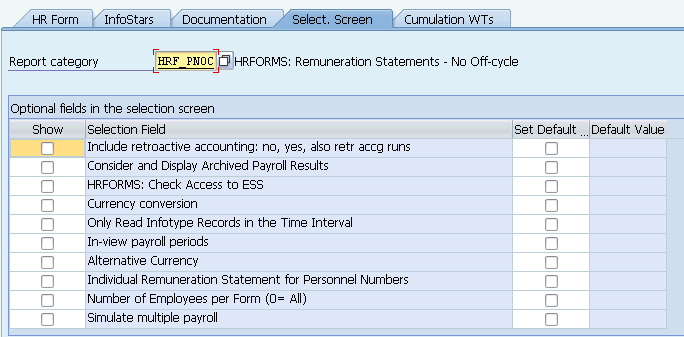
Figure 5: Selection Screen
The MetaNet contains MetaStars, MetaStarts contains MetaFields and is displayed in the system as an overview tree. The MetaNet is above the MetaStar in the hierarchy and is country-specific. It contains, for example,
- Infotypes (such as Organizational Assignment (0001) and Basic Pay (0008)) that contain Personnel Administration and Personnel Time Management data.
- Internal tables (such as RT, BT, and SV) that contain payroll results from the Payroll system.
By Selecting the required fields and using Drag & Drop Feature, the fields get placed in the Infonet Area as shown below. Once the data gets placed in the Infonet Section, they are referred to as Info Stars.
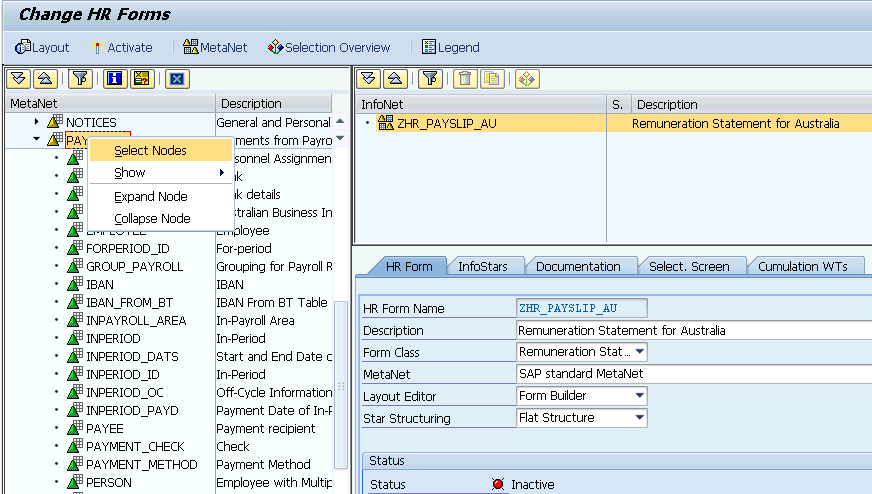
Figure 6: MetaNet, InfoNet
The Info Star names can be renamed and corresponding Meta Star name is displayed in the Info Star tab as shown in the Figure 7.
The Meta Field Details which consists of the fields under it can be seen by selecting the Show Details button as shown in the Figure 7.
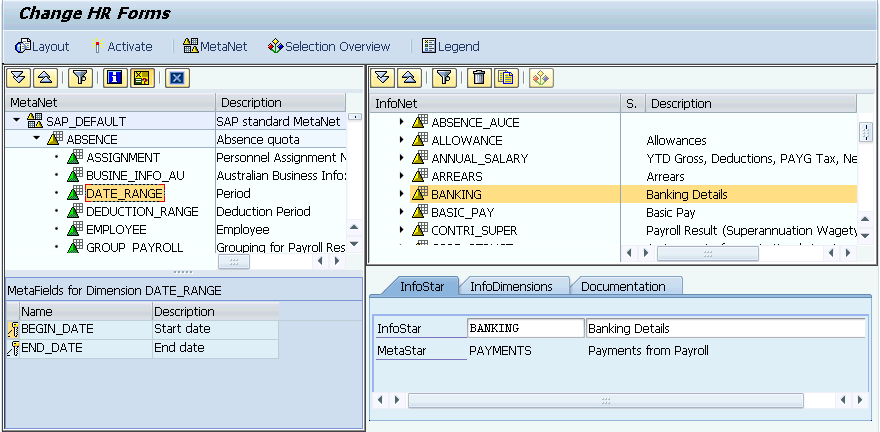
Figure 7: Show Details
Selection Overview can be used to filter the data by providing the selections in the selection table as shown in Figure 8.
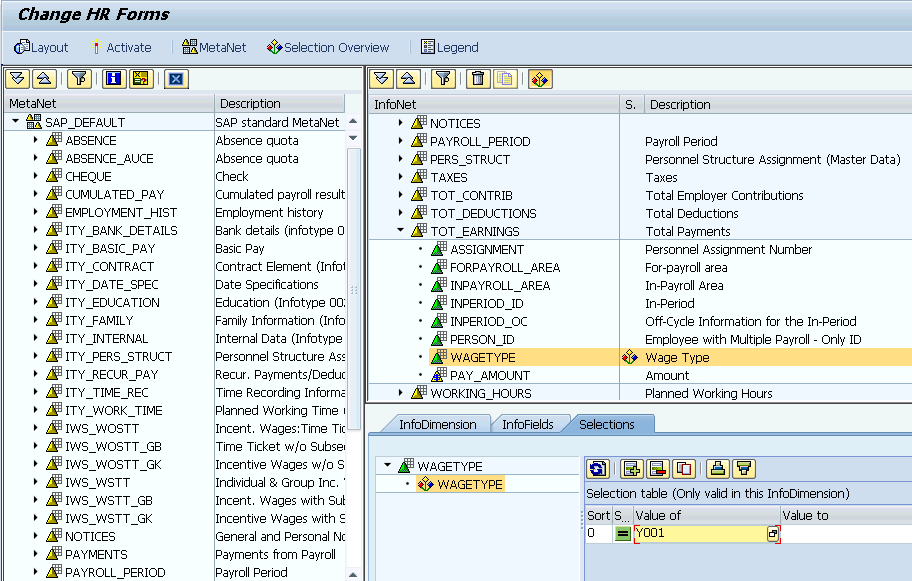
Figure 8: Selection Overview
This ends up the creation of HR Forms Section . Next step is to proceed for Adobe Form Creation from the HR Forms Workplace.
STEP 3: Adobe Form Creation
Select the Layout Button, which navigates into the Adobe Forms exiting the HR Forms.
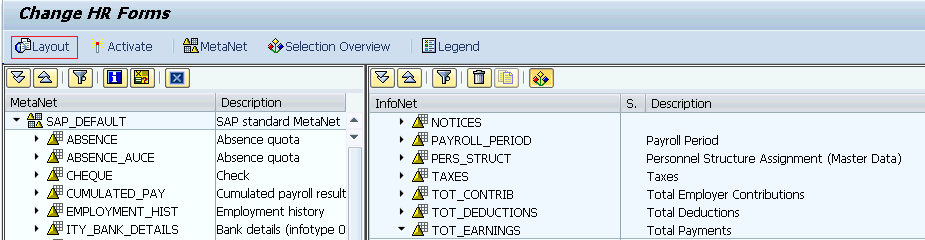
Figure 9: Layout
A Form Interface is created for HR Forms using Form Builder (Adobe Forms) as shown in the Figure 10.
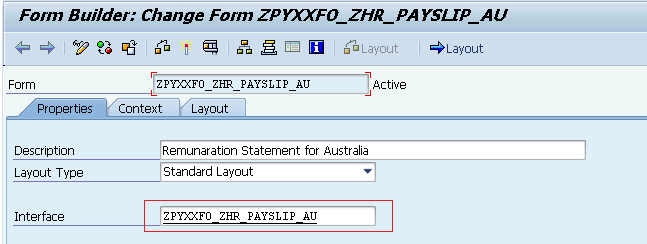
Figure 10: Form Properties
Double clicking on the interface name will navigate the user to Form Interface where user can write specific code by creating fields in the global data.
The interface can also be accessed using the T-Code SFP by entering the interface name.
The Form Interface appears as follows, which is divided into Form Interface, Global Definitions, Initialization and Currency/Quantity Fields.
Form Interface – To pass the data between the form and interface.
Global Definitions – To make data available in the form.
Initialization – To write the custom code and performs.
Currency/Quantity Fields – To assign a reference to currency/quantity fields
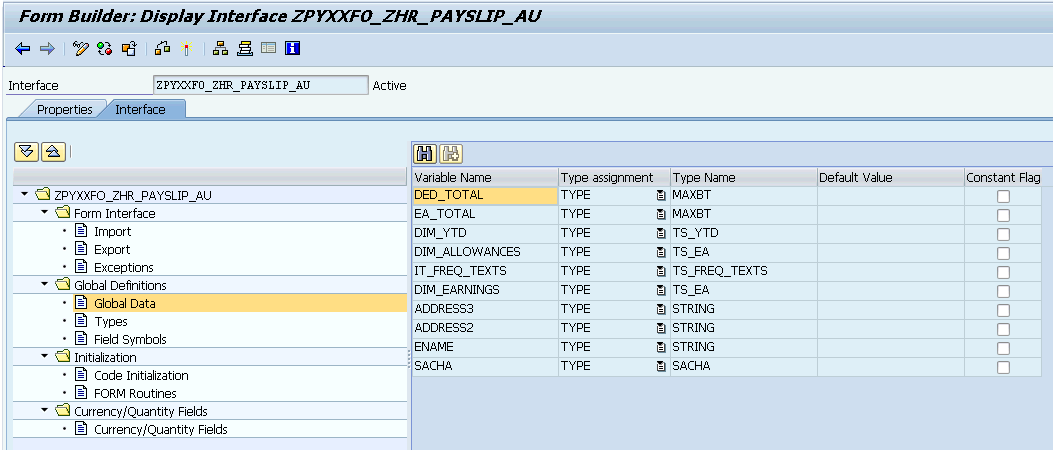
Figure 11: Form Interface
In the Context tab, use the drag and drop feature to select the data from Import folder of Interface section to Context section.
Under Global Data folder, the data which is created in the form interface is available.
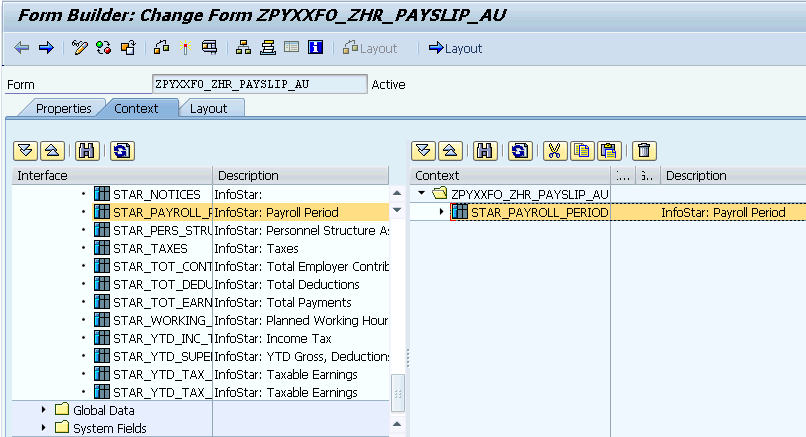
Figure 12: Context
Under the context section, right click on the field and set it to active to appear or deactivate not to appear in the form layout as shown below.
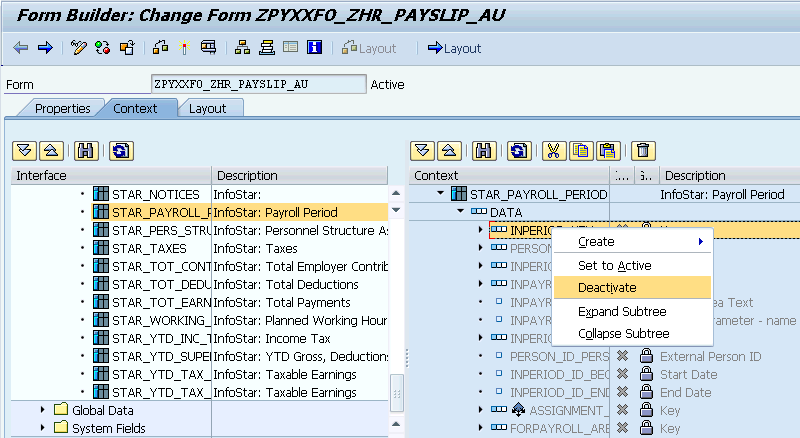
Figure 13: Set to Active / Deactivate
Data in the context can be filtered by using the Where conditions and conditions by selecting the field in the context as shown below.
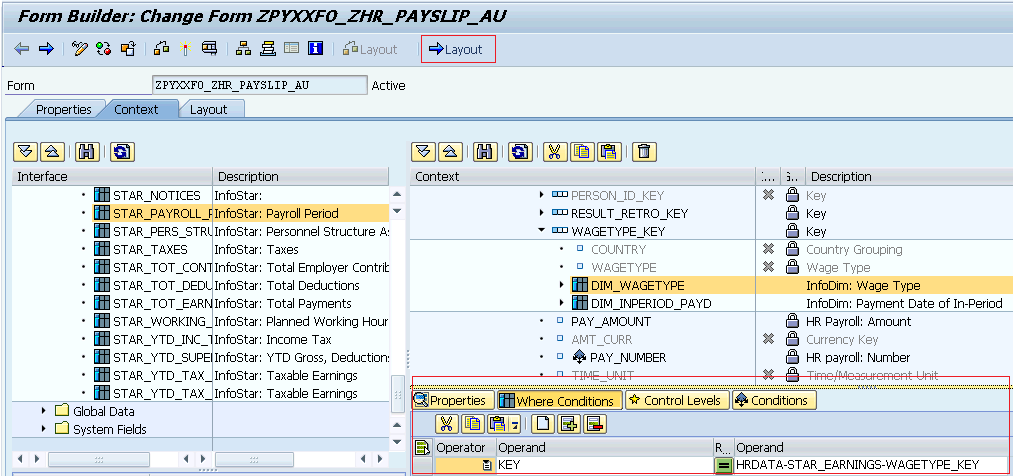
Figure 14: Where Conditions
Click on the Layout button as shown in Figure 14, which navigates the user to Layout page of the Adobe forms.
The Layout page consists of Hierarchy, Data View, Layout Editor, Object Library.
Hierarchy – It consists of the hierarchy of the views designed in the form.
Data View – It consists of the data that can be used in the form by drag and drop feature.
Layout Editor – It consists of 3 sub sections
1. Design View – Used to design the form which includes tables, images, etc..
2. Master Page – Used to design the header, footer which repeats for each page
3. Preview – Used to preview the page
Object Library – It is used to set the Layout (Margins, Anchor position, etc…), Border, Object Properties.
The Layout page after the design looks as figure below.
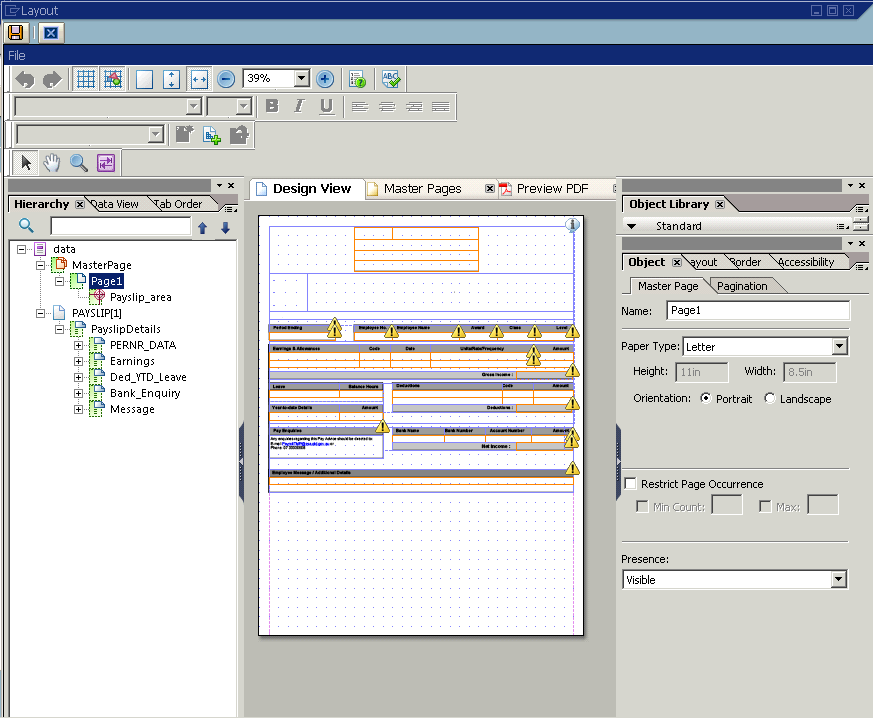
Figure 15: Layout
After completion, save the layout and activate the form, HR form.
STEP 3: Execute the HR Form
Execute the HR Form, depending in the Spool Settings the Form is selected from HR Workplace & sent to Spool.
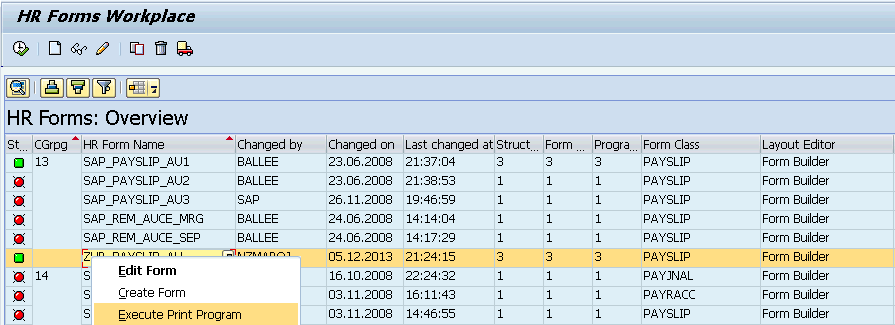
Figure 16: Execute HR Form
This ends the process of creating of HR Forms-Adobe Forms.
Leave A Comment?
You must be logged in to post a comment.