Adobe FORMS
Adobe Forms provides many good features which are not possible with other kind of forms.
So, Adobe Forms stands as very efficient alternative for the Smartforms for the next generation document services.
Adobe Life Cycle Designer is required for building form in the Adobe Forms. Adobe Forms is accessed by the T-Code SFP.
Adobe Form Builder
T-Code SFP will navigate us to entry point for the Form Builder.
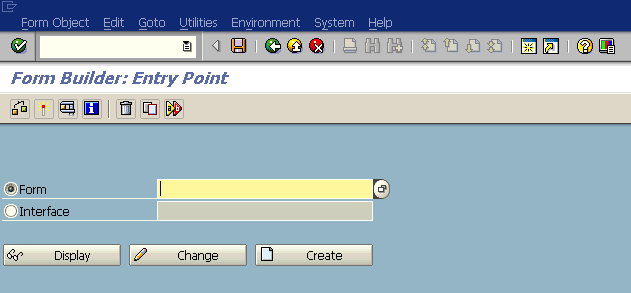
Figure 1: Adobe Form Builder
Form Interface
Every form requires an interface to be created first as because interface is the one through which we can get the required data based on the user inputs.
Step 1: Create Interface
To create an interface, check the Interface radio button, enter the interface name and click on create button.
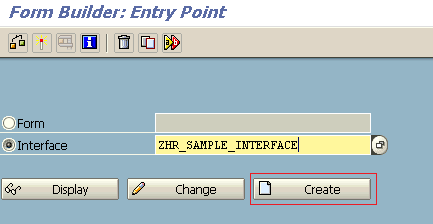
Figure 2: Form Interface Creation
Enter the description for form interface, select interface type and click on the save button.
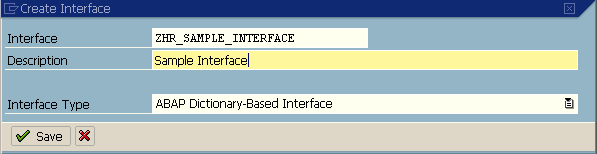
Figure 3: Form Interface Description
STEP 2: Declare Interface Parameters
On creation of the interface the following default initial interface screen appears which is divided into different sections.
- Form Interface
- Global Definitions
- Initialization
- Current/Quantity Fields
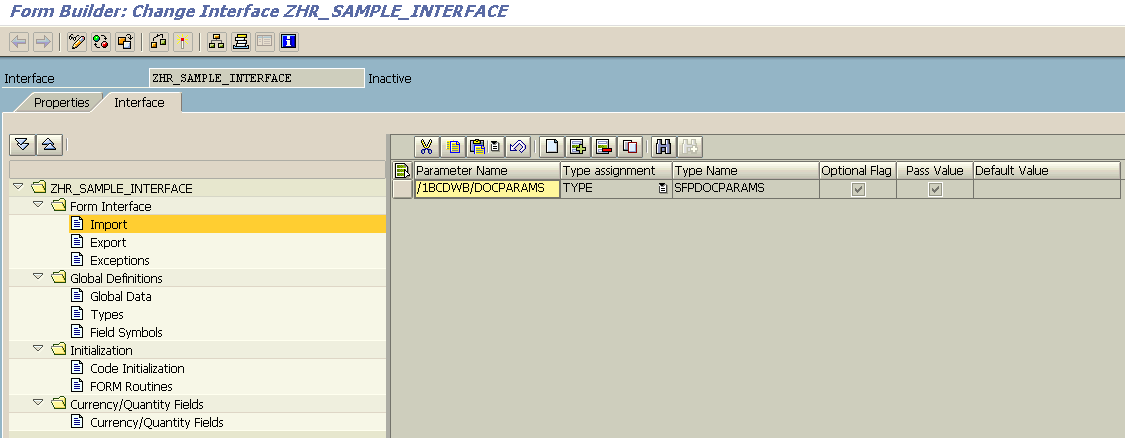
Figure 4: Default Interface Screen
Form Interface consists of the parameters Import, Export and Exceptions which consists of default parameters as shown in the Figure 4.
Import – Used to receive inputs
Export – Used for providing output
Exceptions – Used to raise exceptions
Global Definitions consists of the parameters Global Data, Types and Field Symbols.
Global Data – Used to declare the data which can be accessed globally throughout the Form.
Types – Used to declare the types that can be used global throughout the interface.
Field Symbols – Used to declare the field symbols which can be accessed globally throughout the interface.
Initialization consists of the parameters Code Initialization and Form Routines.
Code Initialization – Used to write the regular code to retrieve the required data.
Form Routines – Used to write the performs which are used in the code initialization.
Currency/Quantity Fields consists of the parameter which is used to set the data type for the fields.
Create a new import parameter for the user to enter Personnel Number in the selection screen.
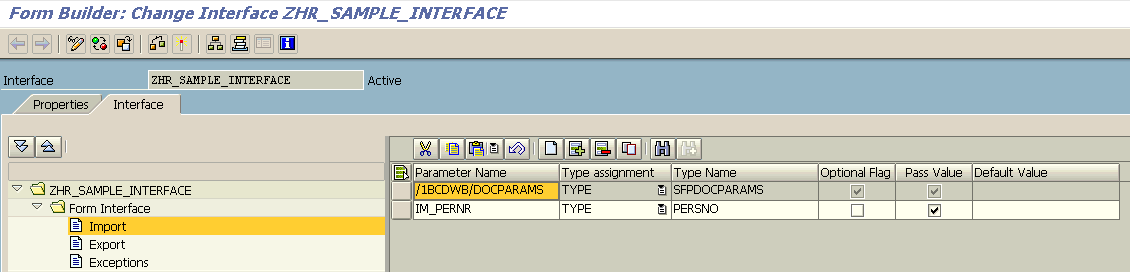
Figure 5: Create Import Parameter
Create a types parameter for the employee data.
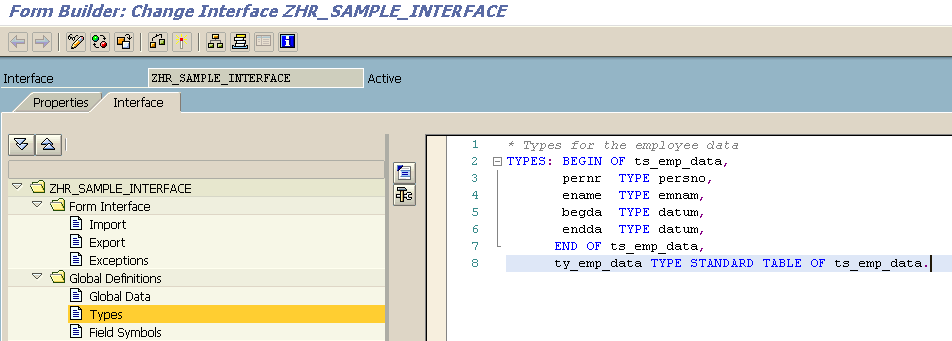
Figure 6: Create Types Parameter
Create the global data parameters for personnel number, last name, first name and employees table.
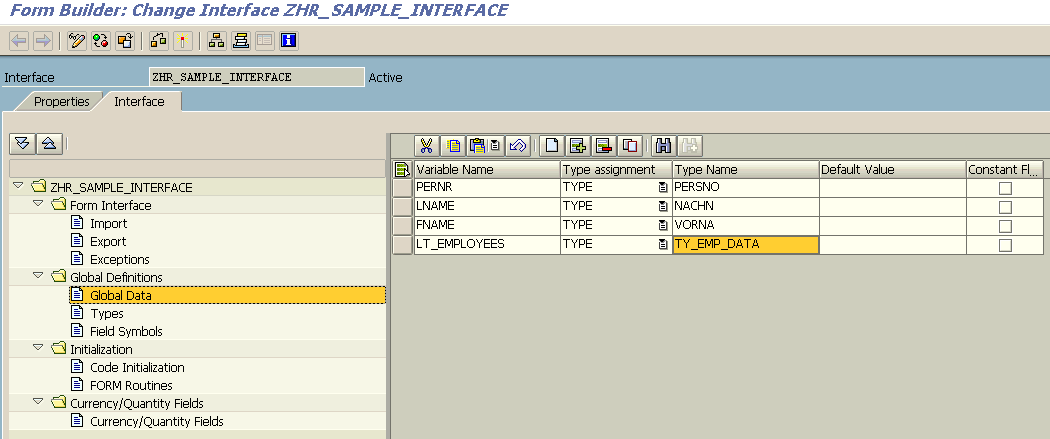
Figure 7: Create Global Data
STEP 3: Code Initialization
In the Code Initialization, provide the import parameter as im_pernr and write the code to retrieve last name, first name based on the pernr entered.
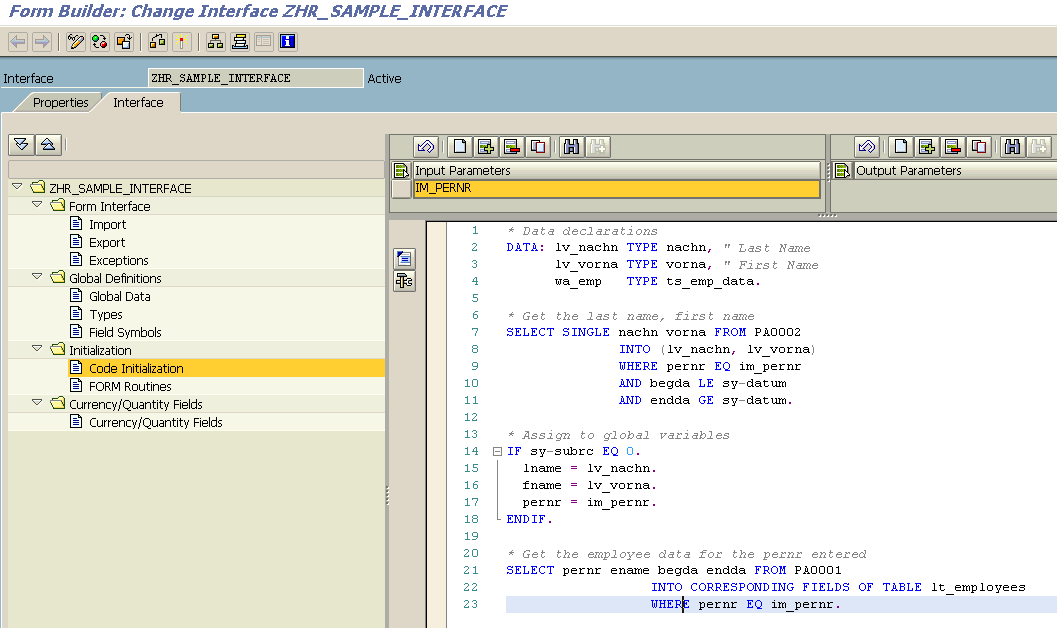
Figure 8: Code Initialization
The toolbar button is used for the Pretty Printer and button above it is used for the Pattern in the Code Initialization.
Inorder to debug the interface the keyword BREAK-POINT can be used as there is no option of break-point directly.
Adobe Form
Every Interface is required with a form to display the data output in desired layout.
Step 1: Create Form
To create a form, check the Form radio button, enter the interface name and click on create button.
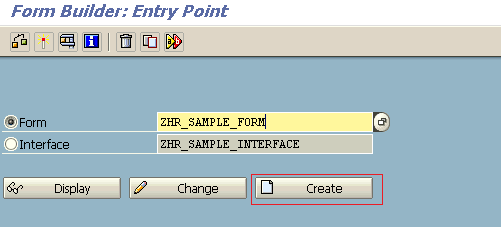
Figure 9: Form Creation
Enter the description for form, select associated interface and click on the save button.
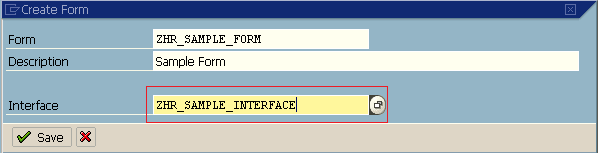
Figure 10: Assign Form Interface
Step 2: Maintain Data
On creation of the form following default initial form screen appears which is divided into different sections with the parameters created in the interface.
- Import
- Global Data
- System Fields
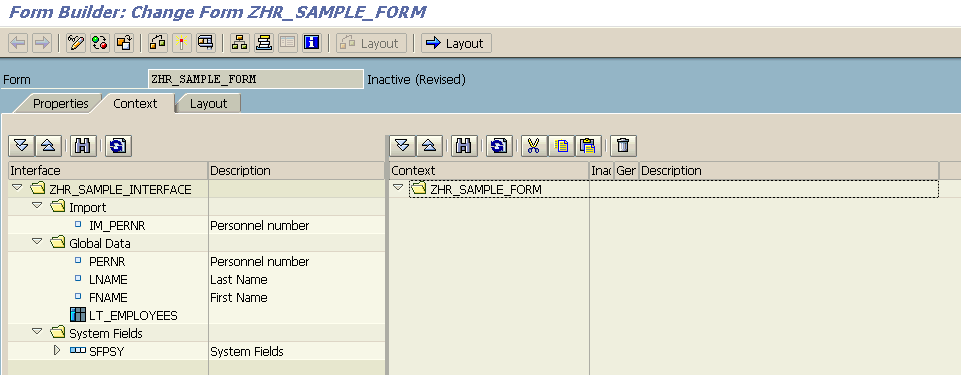
Figure 11: Default Form Screen
Drag and drop the required parameters from the left hand side to the context in the right hand side. So that they will be available in the layout section.

Figure 12: Context Section
Where Conditions & Conditions can be written to filter the data based on a parameter.
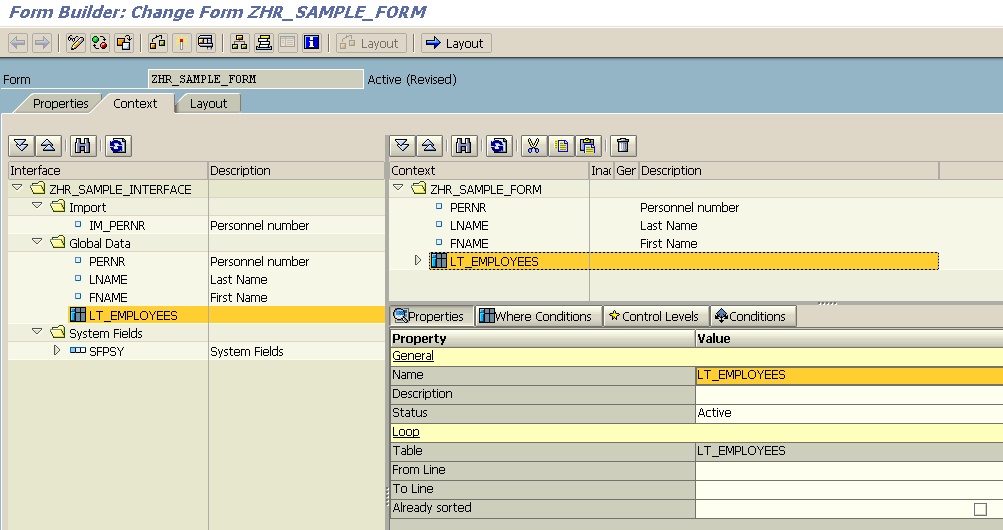
Figure 13: Where Conditions & Conditions
Step 3: Maintain Layout
Click on the layout tab to navigate to the form layout section. Layout button can also be used for the full screen layout.
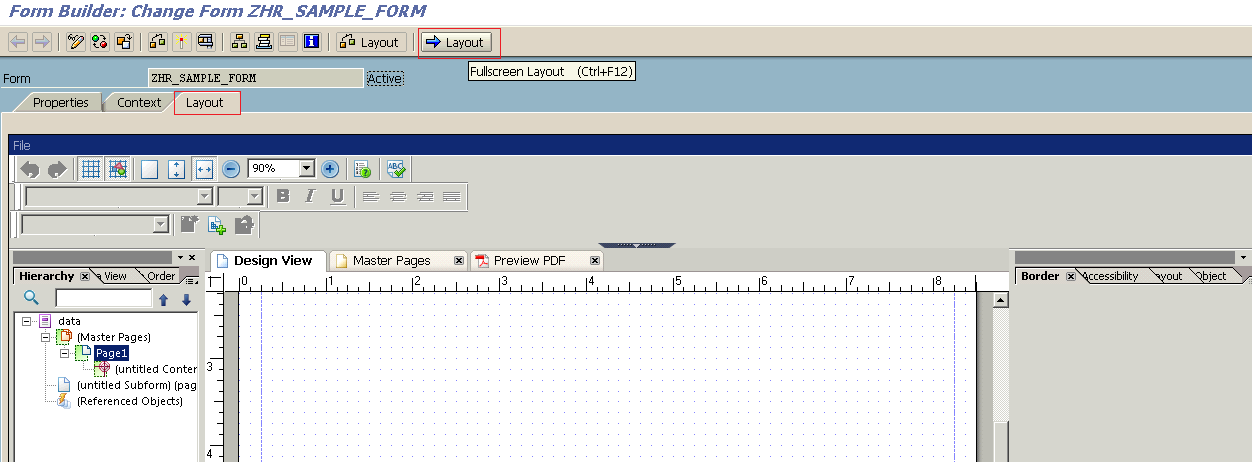
Figure 14: Form Layout
The workspace consists of the various palettes and the layout section.
The Layout section is further divided into three sections
- Design View
- Master Pages
- Preview PDF
Design View to used to design the regular output that is required to be displayed
Master Pages are used when content is required to be repeated in every page.
Preview PDF is used to see the preview of the layout designed.
Following are some of the palettes available in the layout.
· Font Palette
· Data View Palette
· Hierarchy Palette
· Tab Order Palette
· Border Palette
· Accessibility Palette
· Layout Palette
· Object Palette
In Master Pages section a content area is required, which can be designed in the Design Form section.
From standard tab of Object Library, Drag and drop a Text which is used as an heading in every page.
In the Font Palette necessary properties can be set to get the below output.
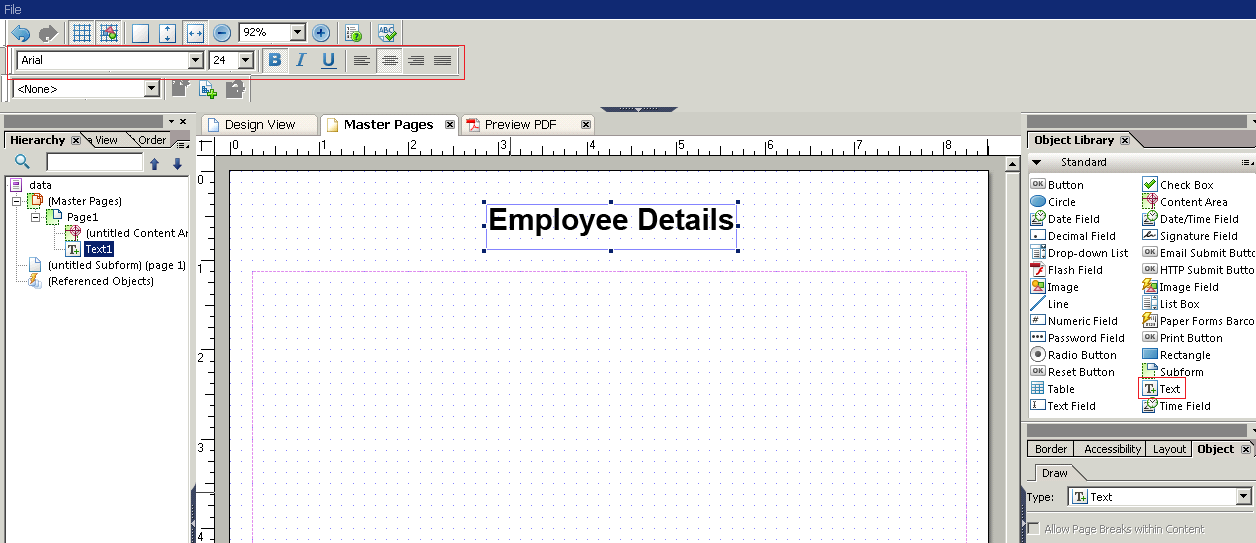
Figure 15: Font Palette
Drag and drop a Sub Form from the object library into the design view.
A subform can be moved from one place to other place by selecting the green rectangle at the top right of the subform as shown in the figure 16.
In the Data View Palette, drag and drop the required properties into the sub form.
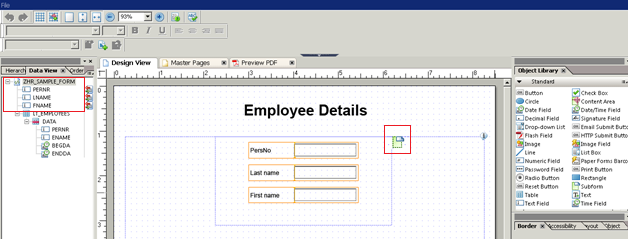
Figure 16: Data View Palette
In Hierarchy Palette, select the pernr field which will hilight the field in the layout section which allows to edit the properties.
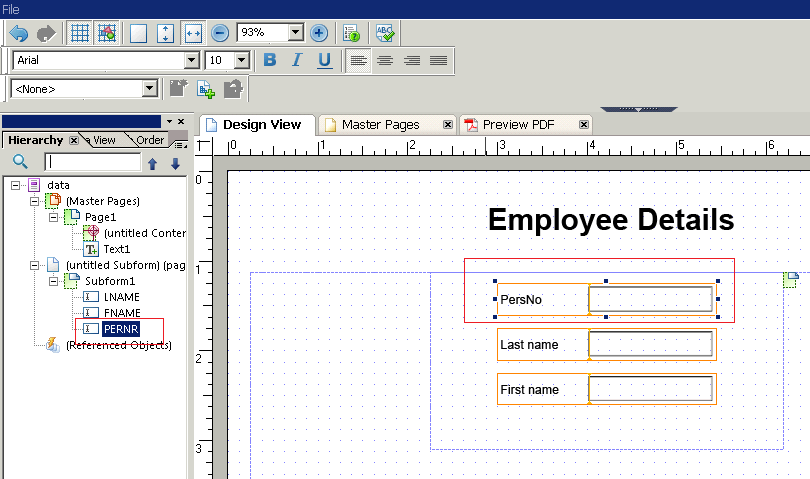
Figure 17: Hierarchy Palette
In Object Palette, Caption, Appearance, Value Type and Data Binding can be changed as shown in the figure 18.
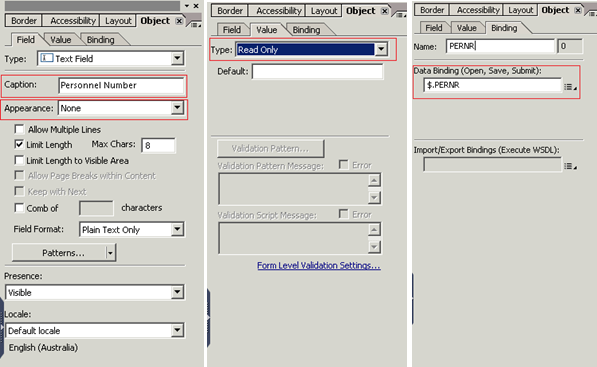
Figure 18: Object Palette
In Layout Palette, Margins and Anchor Position (Position of the subform in the form) can be changed as shown in the figure 19.
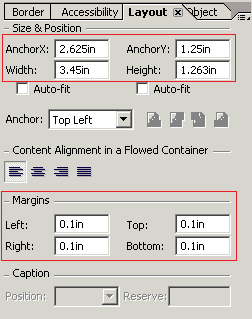
Figure 19: Layout Palette
In Border Palette, Borders and Background color can be changed as shown in the figure 20.
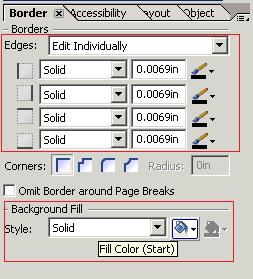
Figure 20: Border Palette
We are now done with the basic layout design and now activate the interface by activate button.
Execute the form which navigates to the selection screen as shown in the figure 21.
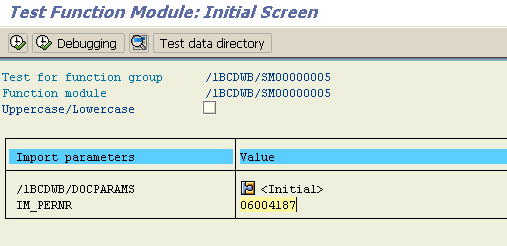
Figure 21: Selection Screen
After executing the above screen, select the output device as LP01 and select the Print Preview button to get the PDF preview as shown in figure 22.
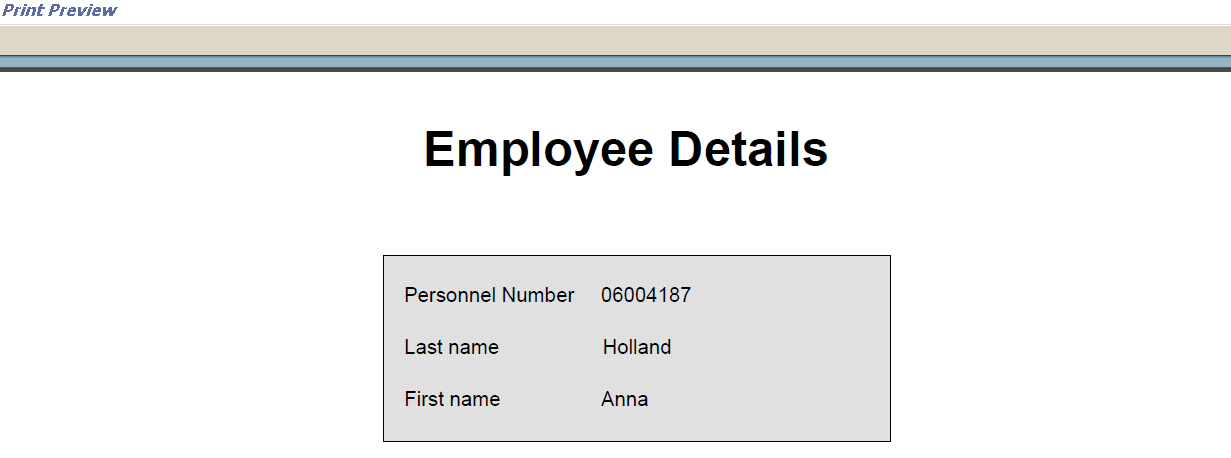
Figure 22: PDF Preview
With this creation of basic adobe form is completed.
Table Display
Now we will create the table display in the form.
Create another subform in the layout and drag and drop the table LT_EMPLOYEES from the data view into the subform.
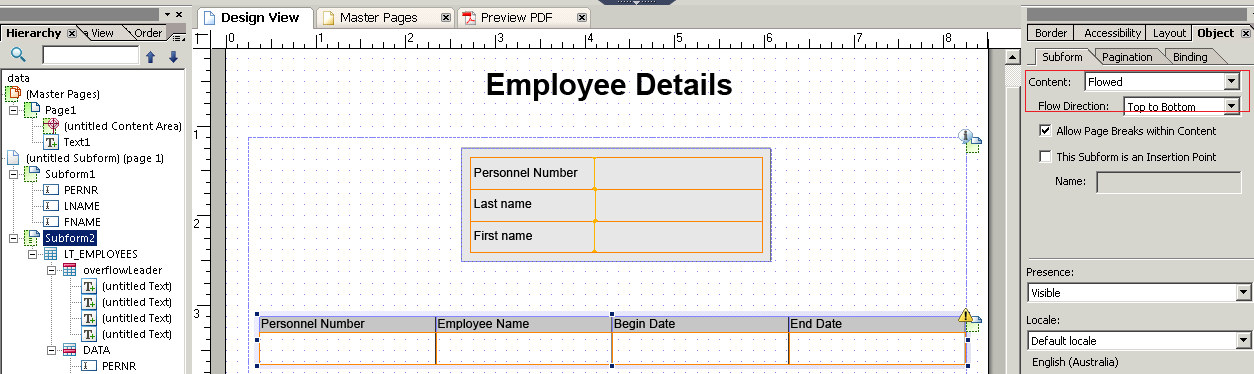
Figure 23: Table Display
Select the subform in the Hierarchy and select the content as Flowed in the subform sub tab of object tab.
Flowed – Data will be overflowed to next page on increase of records
Positioned – Data will not be overflowed to next page
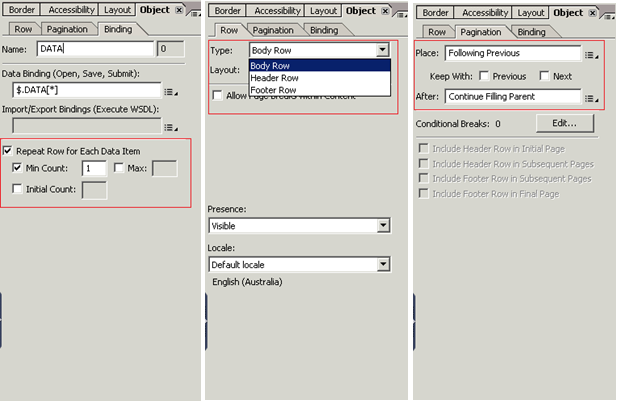
Figure 24: Table Properties
In the Binding sub tab besides setting the binding user can also mention the minimum, maximum and initial count of the rows in the table.
In the Row sub tab user can specify the type of row, whether a body row, header row or a footer row.
In the Pagination sub tab user can if the table need to move down when the above object is overflowed.
Patterns
Patterns are used to format the data displayed on the form.
Now we will restrict the pernr not to display only last 7 letters i.e, 6004187 instead of 06004187. This can be done using the patterns.
Select the pernr field from the hierarchy and click on the patterns under the object palette.
In the Pattern text box enter the pattern to format the pernr display as shown in the figure 25.
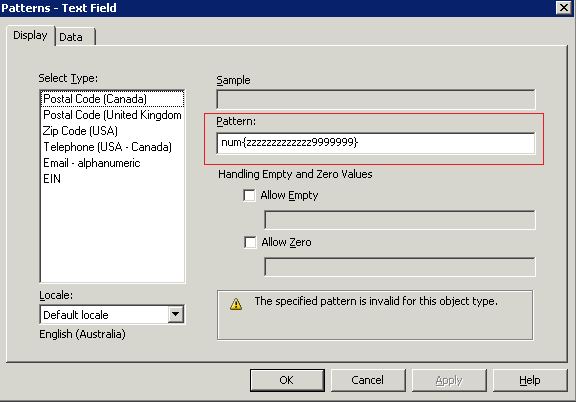
Figure 25: Pattern
Scripts
Scripts are used in the adobe forms to hide the subforms, to calculate the subtotals and totals of the table.
Select the pernr field in the hierarchy and write a script to hide the table when pernr is provided as null as shown in the figure 26.
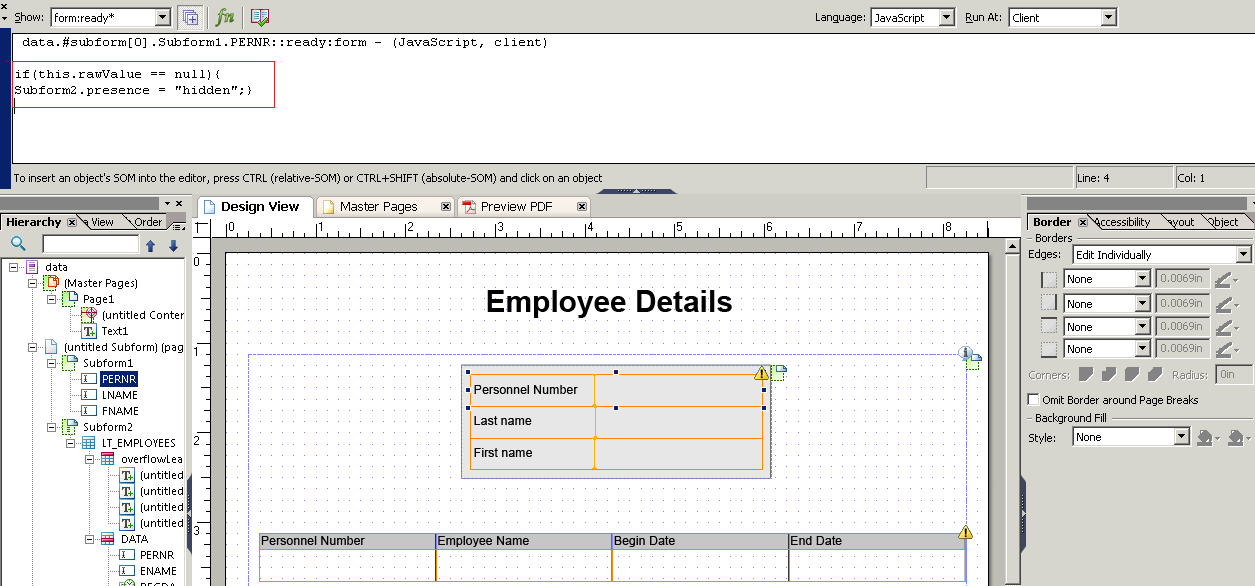
Figure 26: Scripts
Scripts can be also used to do the form validations.
Finally the output of the developed adobe form looks as shown in the figure 27.
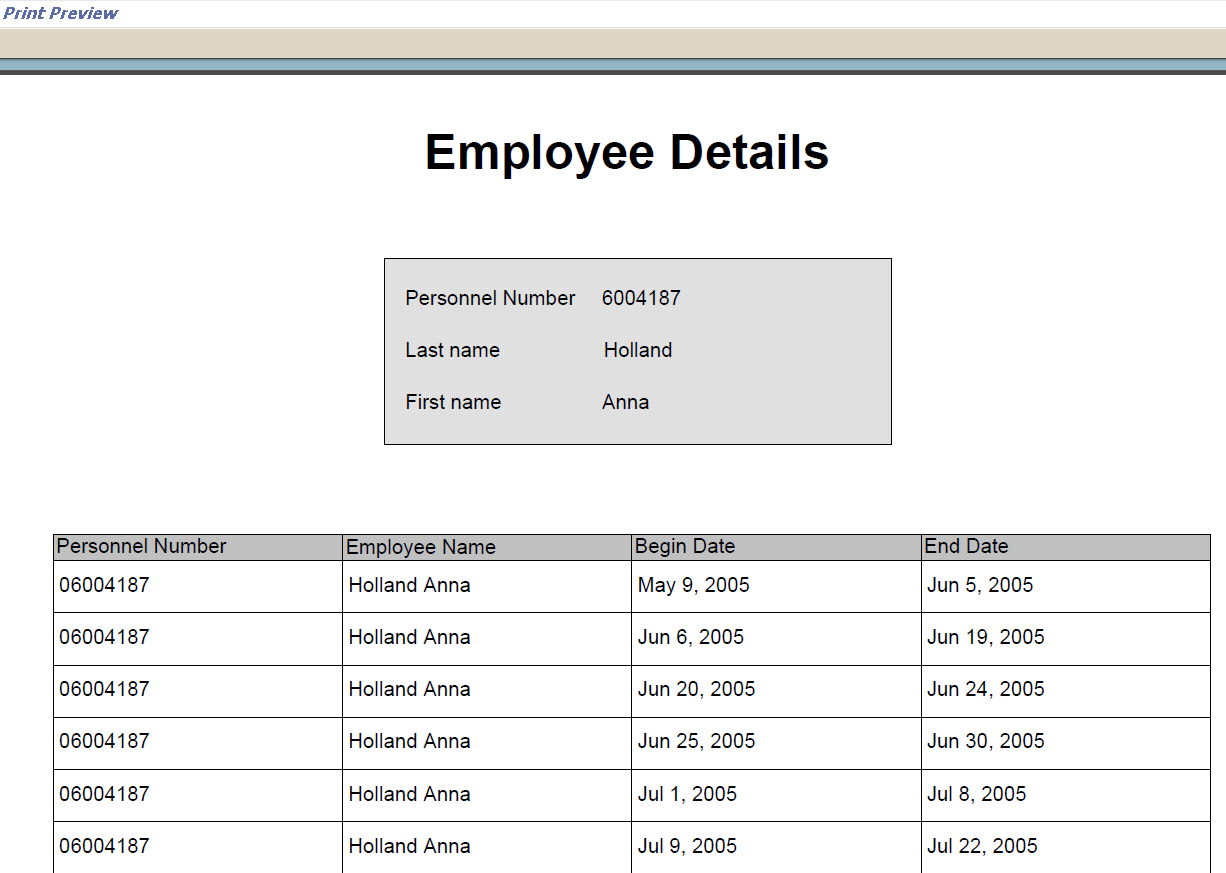
Figure 27: PDF Output
Leave A Comment?
You must be logged in to post a comment.