If you have ever converted Organization Management data in SAP, you may have run into a situation where you’ve loaded data incorrectly, but were unable to overwrite the existing load by re-loading. The error needs to be corrected, but how can you go able this without having to perform a full client refresh?! Well you don’t have to worry because SAP provides a standard deliver program to delete OM data.
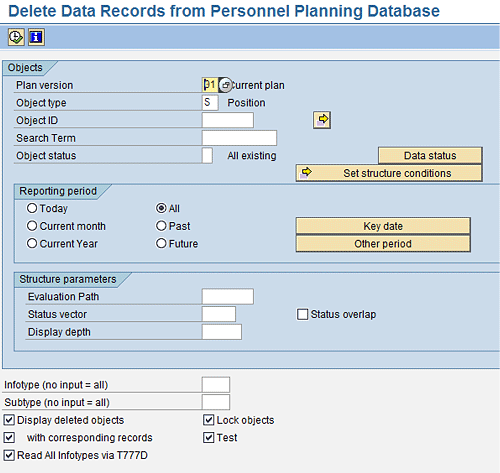
Transaction Code: RE_RHRHDL00
The transaction code RE_RHRHDL00 is an extremely powerful transaction that is used to execute the Delete Data Records from Personnel Planning Database program RHRHDL00. When using this transaction, you must ensure you are selecting your data set carefully, as it does have mass delete capabilities and can delete a significant amount of your OM data.
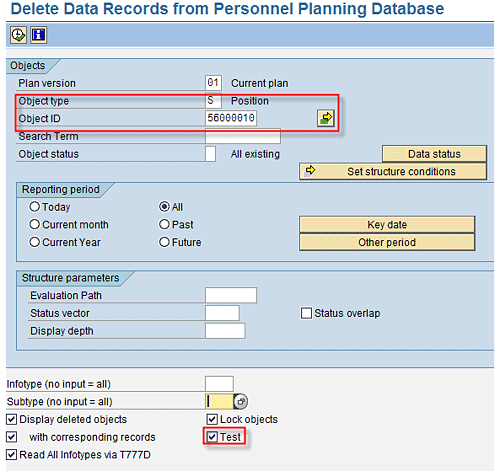
Test
The first thing to note about this transaction code is the “Test” option. Once data is deleted from this transaction, it cannot be easily restored – so it is highly recommended to always execute in test mode prior to executing an actual deletion. Executing test mode with the appropriate options will display a list of all objects and records to be deleted. This list should be confirmed prior to executing the deletion.
Example: Delete all positions in the number range 56000010 to 56000020 in Test mode. I have not specified any Infotype or Subtype hence all positions in this range will be marked for deletion.
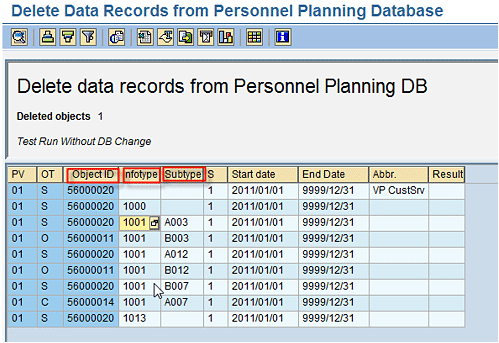
The report will display a list of all the objects and records that will be deleted. This report includes the Object ID, the Infotype of the record, subtype if applicable and other relevant data.
Selecting Data for Deletion
Data selected for deletion can be restricted by the parameters in the fields highlighted below:
Plan Version – restrict which plan version the OM Object(s) is in.
Object Type – restrict the type of objects to be deleted. Only one type of objects can be selected for deletion at one time. If left empty, all object types that match the overall criteria will be selected for deletion. It is recommended you populate data in this field to help identify and restrict the data that is to be deleted. Some examples of Object Type that may be deleted in OM are O – Org Units, S – Positions, C – Jobs.
Object ID – restrict the object ID(s) or range(s) of objects to be deleted. The Object ID should be utilized whenever possible to restrict the objects marked for deletion.
Search Term – if you are not sure what the object ID is, you can use a search term to identify the object ID. Enter the search term and hit enter. A popup with all objects containing the search term that also matches your other search criteria will be displayed. You can specific object you are looking to delete. In the example below, all Organizational Units in Plan Version 01 (Current Plan) with the works “Cup” and “Cakes” in it will be displayed. A total of 2 Org Unit was identified with the words Cupcakes in Plan Version 01.
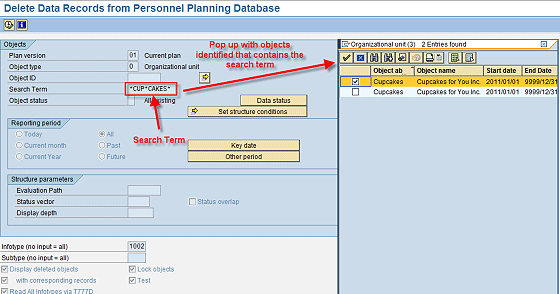
Choose the desire Object and the Object ID will automatically be populated.
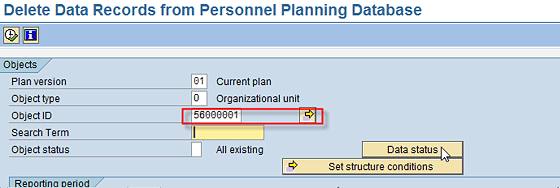
If you are using Object Statues, you can specify the Object Status of the desired object in this field. The status available is: 1 – Active, 2 – Planned, 3 – Submitted, 4 – Approved, 5 – Rejected. This is not something I’ve used in OM, and I usually leave it with the default value – which is empty meaning “All Existing.”
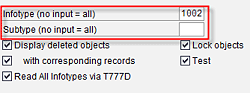
Specifying Infotypes and Subtypes
There are several options that can be configured when executing this transaction code. One of these options is to specify the infotype and subtype, if applicable, of the OM object to be deleted. Only records of the specified infotype will be deleted.
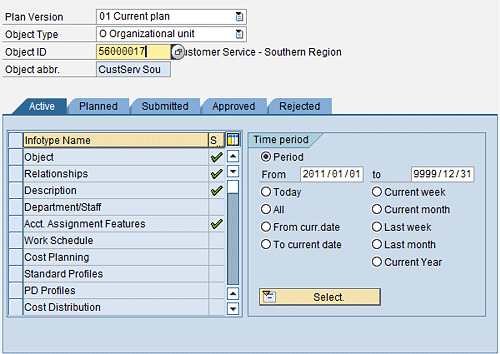
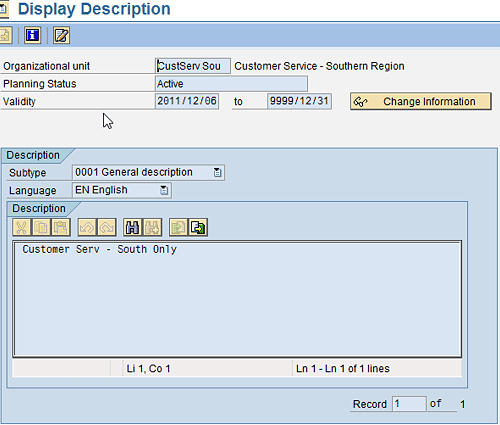
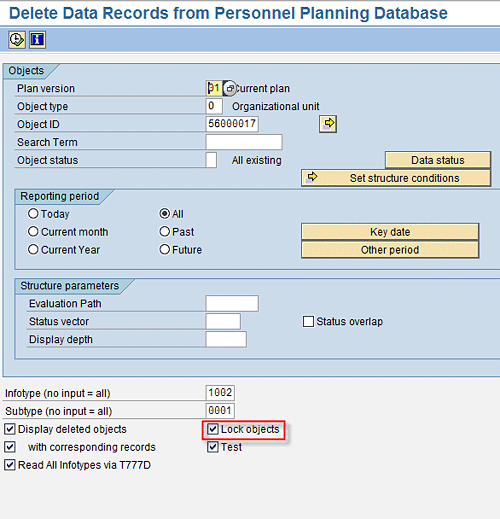
Example: Org Unit 56000017
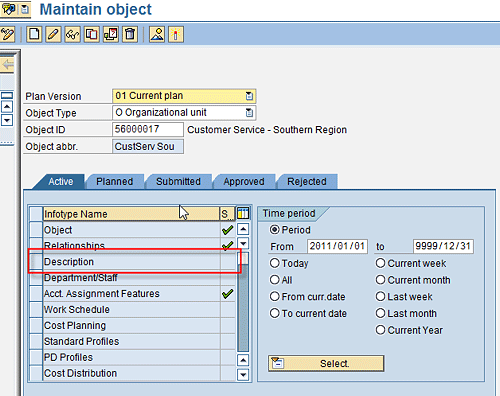
Using PP01, you can see this org unit has data in 4 infotypes: Objects (HRP1000), Relationships (HRP1002), Description (HRp1002) and Acct. Assignment Features (HRP1008).
A Description Record is exists for this Org Unit:
By specifying the object type, object ID and the infotype, we can restrict our deletion to only delete record from this infotype for this object ID. When executing for the first time, always ensure the “Test” flag is checked off to prevent accidental deletion and to ensure the correct record is selected. Once data has been deleted, it cannot be easily restored.
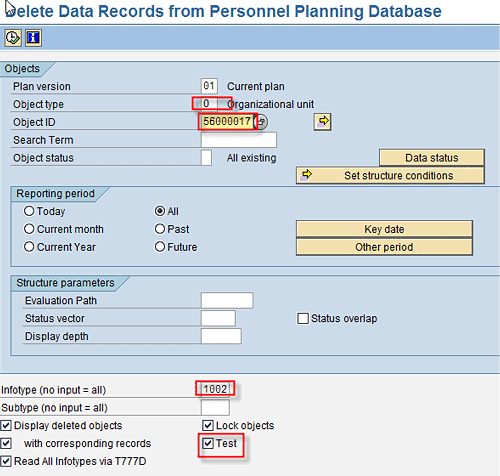
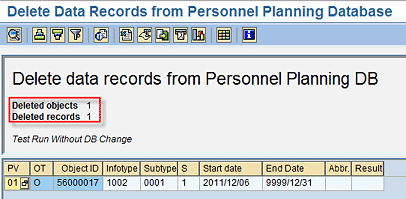
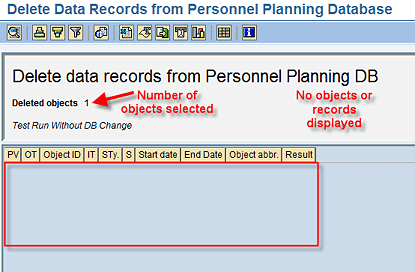
When executing in Test Mode, you will receive a report with the number of objects and records matching the criteria you entered. In our example, there is only 1 record that matches the one object we selected.
Once this report looks correct and is what you expected, you can click “Back” and uncheck ONLY the “Test” checkbox to execute the deletion.
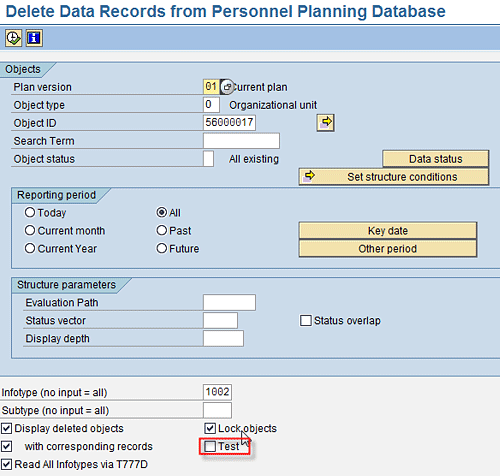
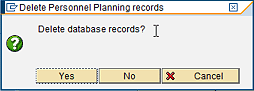
You will be prompted for confirmation to delete database records. Once this has been executed, data cannot be restored easily.
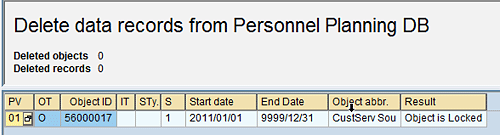
Ensure you do not have the object in Edit Mode on any of your other SAP screens or sessions. If you have it in edit mode anywhere else, you will receive an error in your report saying the Object is Locked.
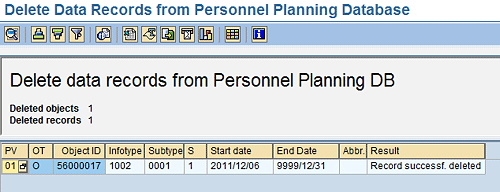
Once you unlock the locked data, execute the deletion transaction. Upon successful deletion, you will receive the following: A “Record successfully deleted” confirmation message, and in addition, a record count of the number of objects and records deleted.
As you can see in PP01, the Descriptions (HRP1002) record has been deleted.
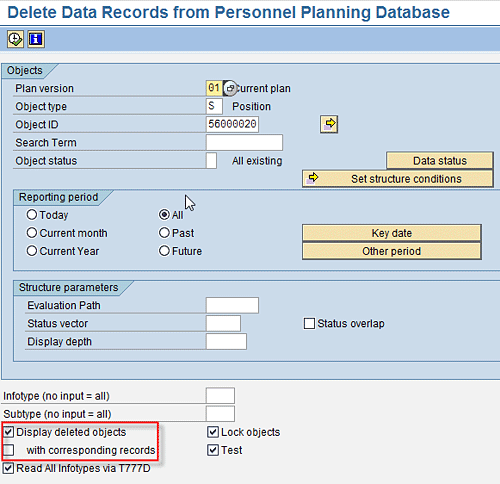
Display deleted objects (optionally: with corresponding records)
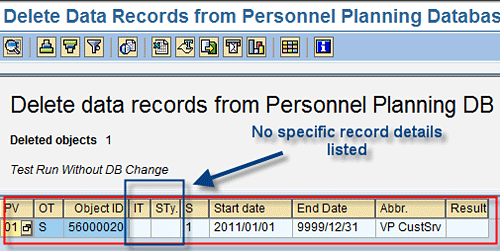
You can choose the type of records you would like to display in your report. The “Display deleted objects” option (without checking the “with corresponding records” checkbox) will only display the object selected for deletion. It will not detail the specific records that will be marked for deletion.
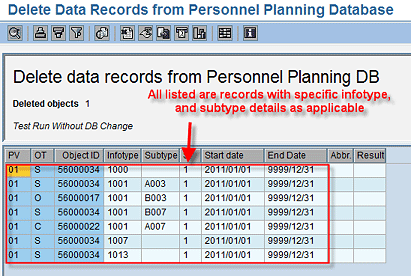
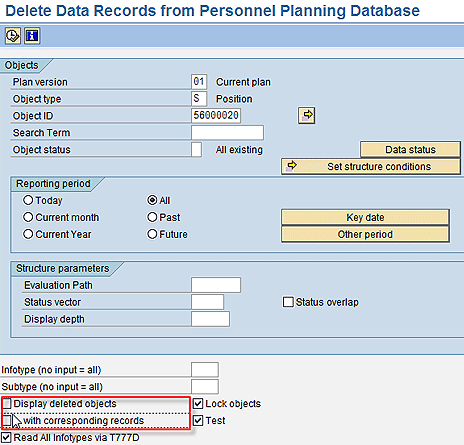
Alternatively, you can choose to display only the “with corresponding records” and not display the deleted objects. This will result in a list of the records to be deleted, but will not include a list of objects.
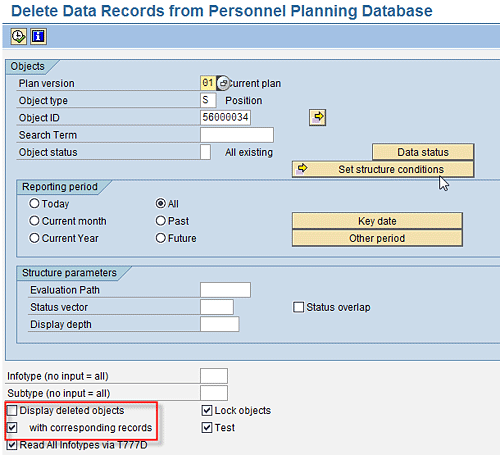
The resulting report will only display the records being deleted and will not contain a list of the objects.
However, you can also choose to “Display deleted objects” as well as “with corresponding records.” This will display the object AND all records that will be selected for deletion.
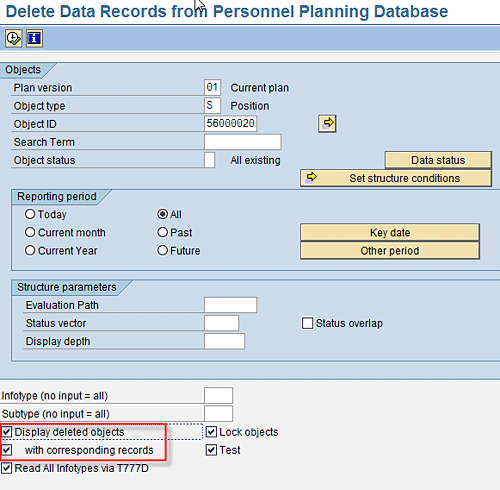
Resulting display of the objects selected AND all the additional records associated with this object that will also be marked for deletion.

Lastly, you can choose to execute without displaying any objects or records. The resulting report will only show the number of objects deleted, but will not detail the specific object or record information.
Lock Objects
The Lock objects check box locks the objects marked for deletion and prevents others from editing it. Note that objects are locked only during actual deletion and are not locked during test mode. It is recommended to leave this turned on (ie. Checked) during deletion to ensure no one else is editing this object at the time of deletion and to ensure you do not receive any errors.
RE_RHRHDL00 – Delete DB records
RE_RHRHDC00 – Delete with list
Leave A Comment?
You must be logged in to post a comment.