Smartforms in SAP ABAP
The following training tutorials guides you how to create smart forms step by step in SAP ABAP. SAP Smartforms are excellent alternatives used to SAP Scripts and referred as mass printing as they are system independent. They allow printing forms in Customer Relationship Management as well as in the applications SAP Sales and Distribution, SAP Financial accounting, and Human Resources.
Smart forms require less time to create and execute than SAP scripts, and it does not require much programming language for programmer as smart forms have a completely graphical user interface to operate. It is integrated into HTML so it can be used easily in internet applications.
You can maintain smart forms by using one of the following navigation method.
- Path: – SAP Menu ->> Tools ->> Form print out ->> Smart forms
- Transaction code: – SMARTFORMS
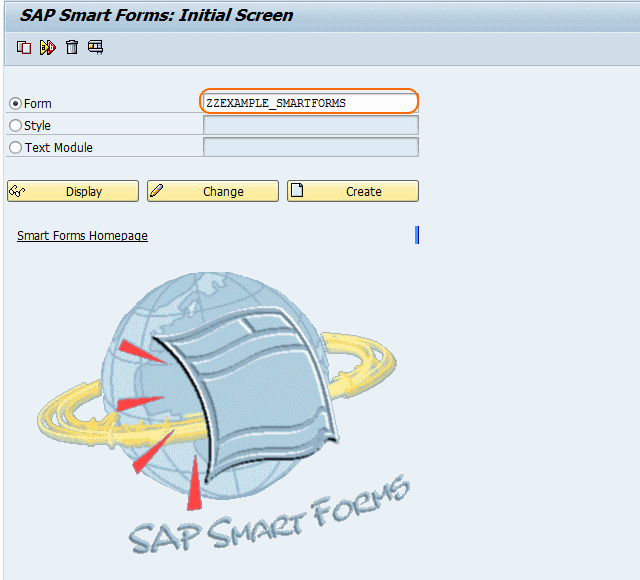
Step 1: – Enter transaction code “SMARTFORMS” in the sap command field and enter.
![]()
Step 2: – On the initial screen, update name of a new form.
Step 3: – In form attributes under global settings, Update the description of smart form.

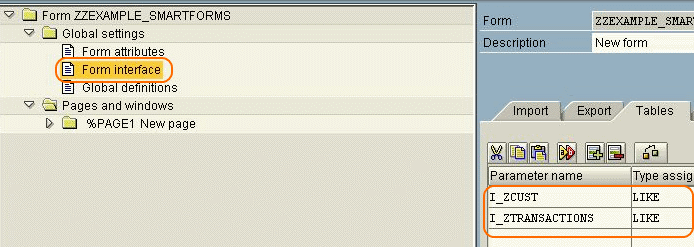
Step 4: – Select “Form interface” and update parameters names, type assignment, associated type.
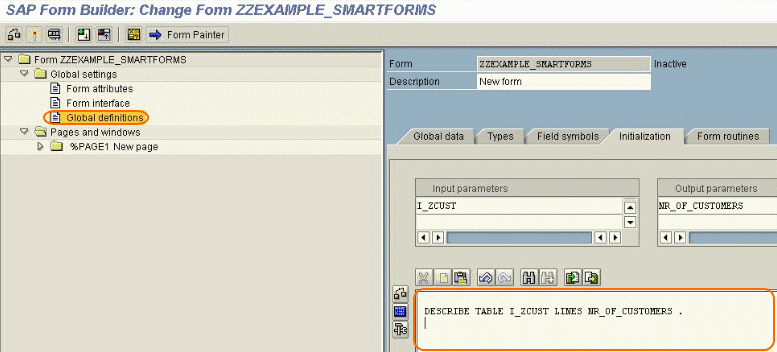
Step 5: – Select global definitions and, write a program to calculate the number of Customers. Give Input and output parameters.
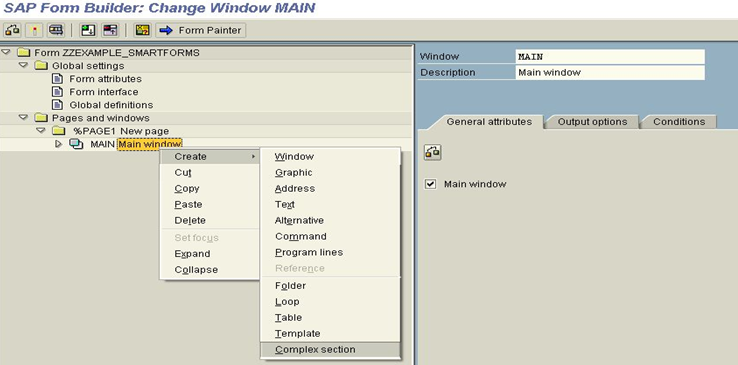
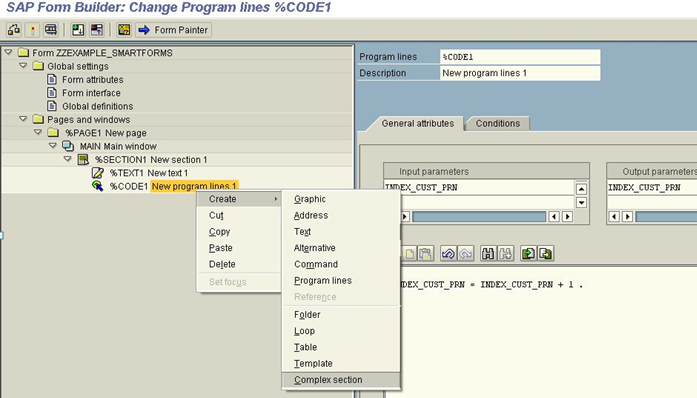
Step 6: – In next step select create and select complex section from context menu
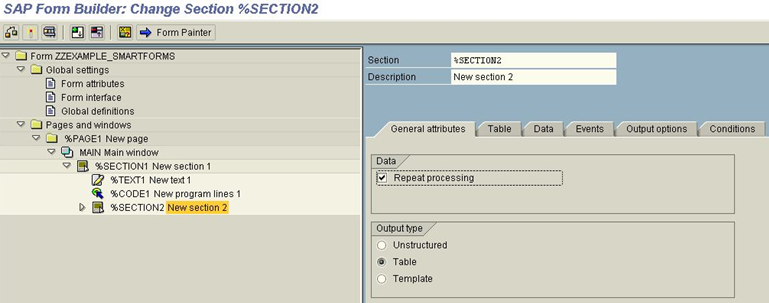
Step 7: – Update section and its description.
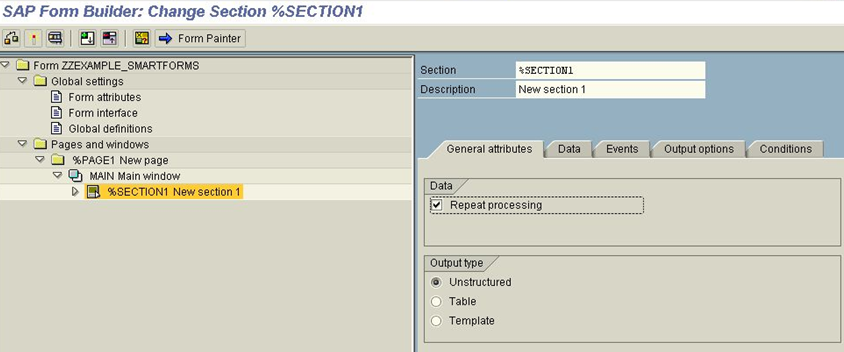
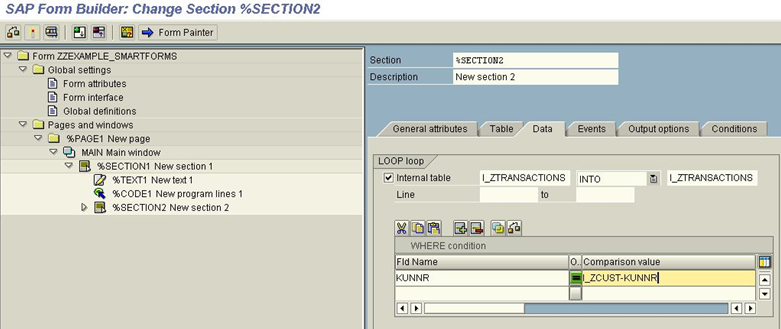
Select data and update details of internal table.
Step 8: – Select the context menu and create a Text Element.
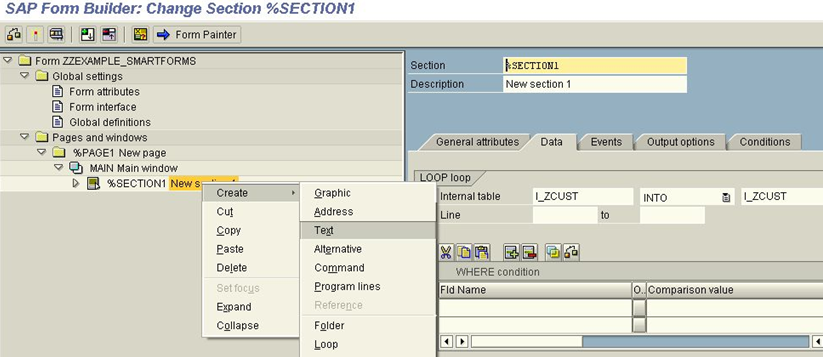
Update the names of the fields of internal table in the General Attributes tab.
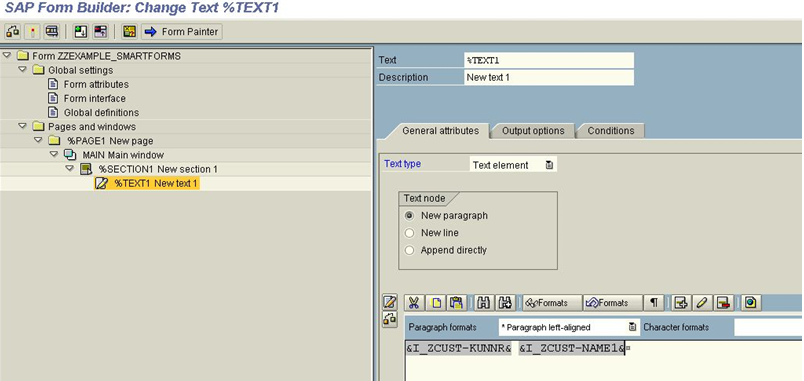
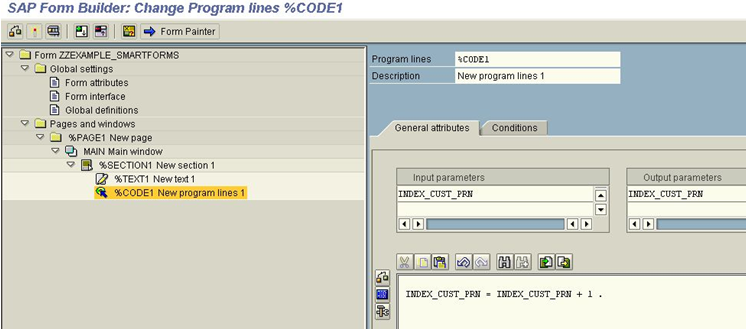
Step 9: – From text element select menu and click on Program lines.
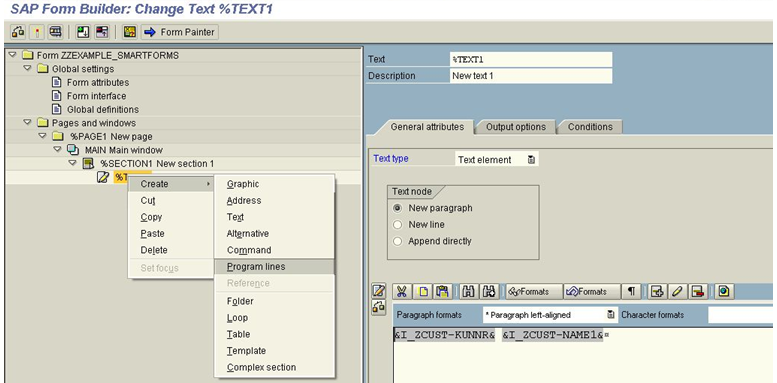
Update the program line under the general attribute.
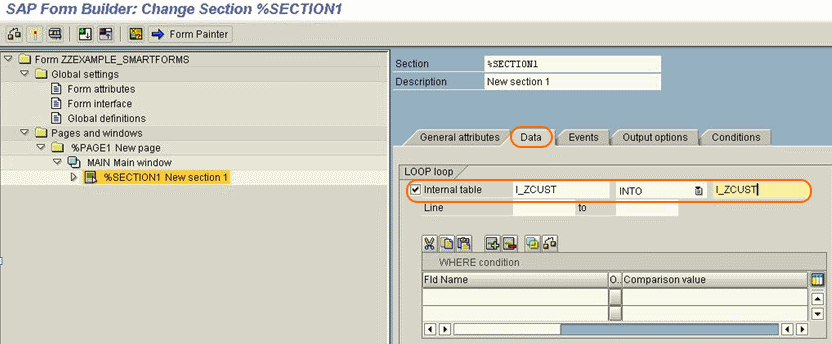
Step 10: – Repeat the same process,
Choose the Data and specify the Loop internal tables as shown below
Step 11: – On Header and Footer events, update the Height of the Footer.
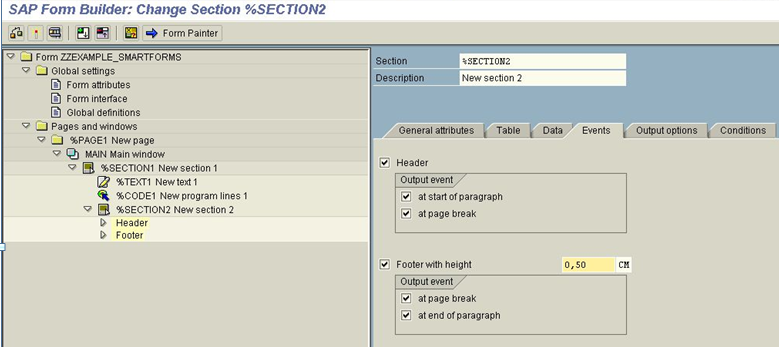
Select the Header node and check the New Line checkbox.
Step 12: – select Create and click on Text as shown below.


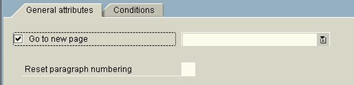
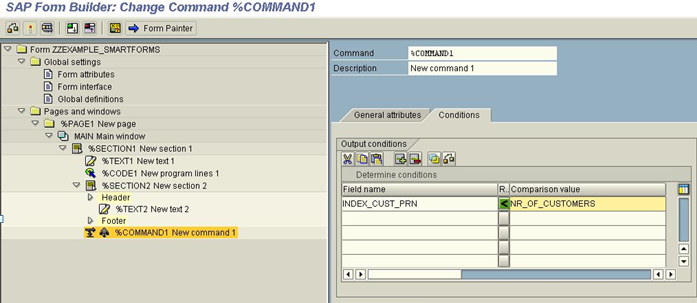
Step 13:- Under Footer Event select Create and then click on Command.


Select the “go to new page” option.
Update field name and comparison value.
Step 14: – Enter transaction code “SE78” in SAP command field and enter.
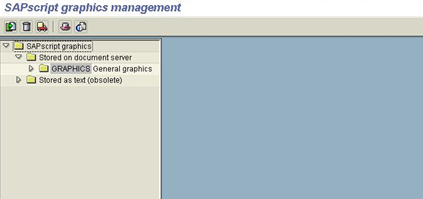
Select the graphics and update the name of graphics
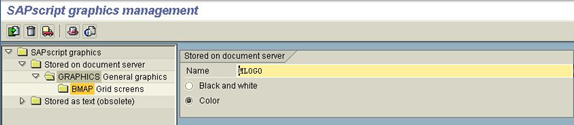
On pop up window, select Resides in the Printer Memory and press enter to continue.
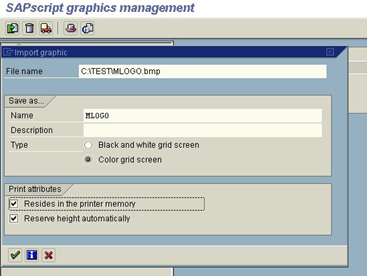
Thus the graphic has been successfully imported into the SAP graphics management.
![]()
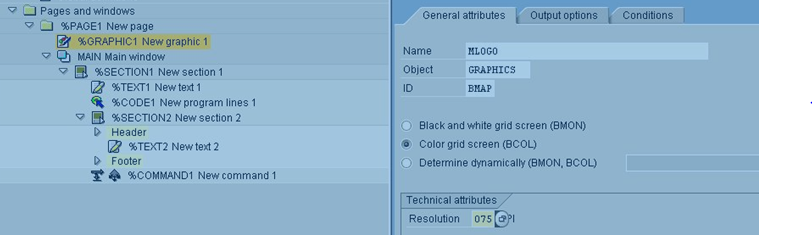
Step 15: – Select the %PAGE1 node. From the context menu click Create and select Graphic.
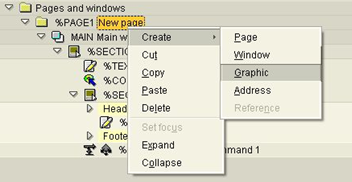
Update graphic name Object, ID, Color attribute and Resolution.
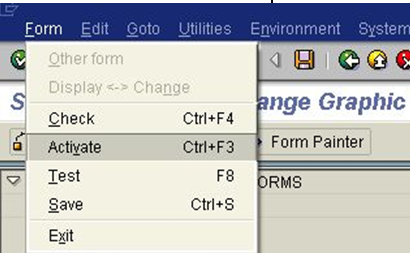
Now active the form, click on form and then select active (shift+f3)
Successfully Smartform has been created in SAP ABAP. Now you can use the same process to create any number of SAP Smartforms.
Leave A Comment?
You must be logged in to post a comment.